🆓 This member post is free for all, thanks to our paying subscribers. Enjoy!
Hi!
It’s not just me that loves iPads in my family, it’s the little bonus kid too. He’s great with it, as most kids are with touch-screen controlled devices. To him, navigating an iPad app, and figuring out a game from the App Store, is a lot easier than, say, using a controller for a video game console. It’s a different world than what I had when I grew up, that’s for sure.
The kid’s got an iPad, obviously. He’s been using an iPad mini 4, but with the launch of the new iPads, I figured an upgrade was overdue. It was also time to give him a little more control over what he could do on his own with his iPad, so I set it up from scratch.
Family sharing and purchasing settings
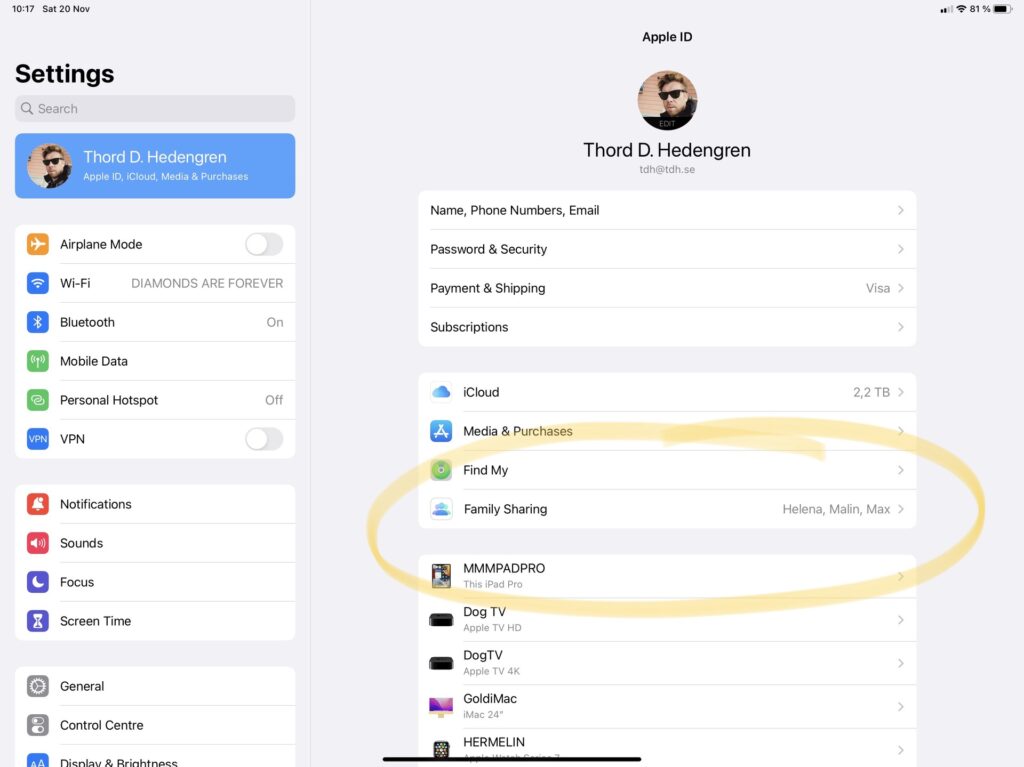
If you haven’t set up an iPad for a child before, there are some things you need to know. You need to create an Apple account for the child because you obviously don’t want to limit what you can do with your own account, since that syncs across devices. Setting up a child’s account is easy enough when you enable Family sharing, which is done through your own Apple ID (preferably on your own device), by tapping your name in the Settings app, and then tapping Family Sharing to set it up.

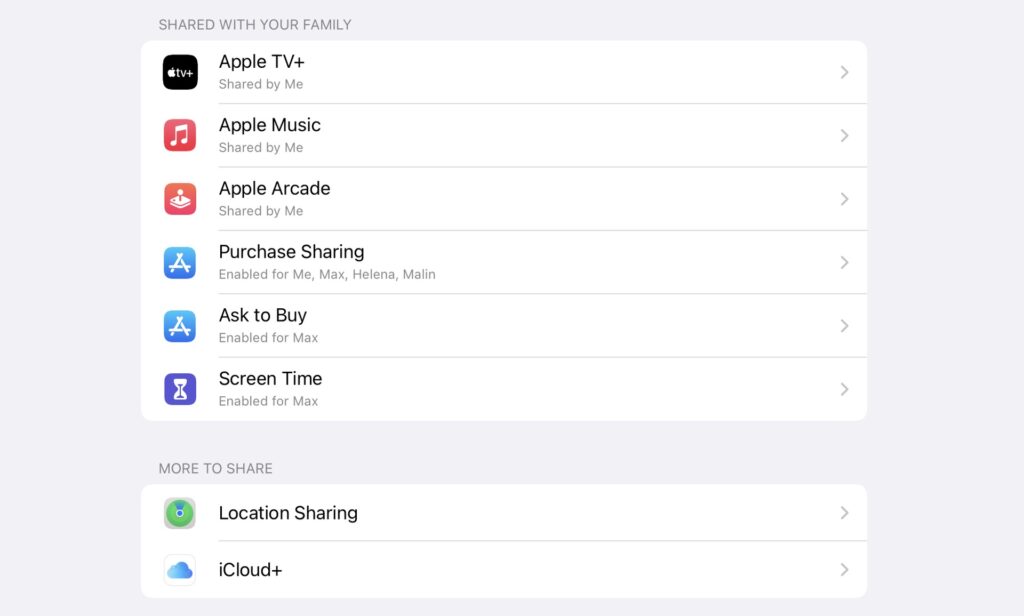
It’s a pretty simple procedure, and you get the chance to set up a child’s Apple ID here as well. Most apps today support Family Sharing, so you buy them once and everyone in your family can use them. This includes several subscriptions, such as Apple Music and Arcade, for example. You can control what to share through the Family Sharing settings once it’s set up.
What’s important is what you want your child to be able to use. This is where Ask to Buy shows up. By enabling this for your child, you let them try to download and purchase things from the App Store, as well as through in-app purchases. The key word is “try” because what happens is that you’ll get a notification where you can either approve, or deny, a purchase or download.

Another thing you might want to turn on is Find My, making sure that your child’s device is accessible through the Find My app. You’ll want to set up a passcode, and Touch ID or Face ID, depending on the device. Making sure that your child’s device is protected is important, so don’t skip that.
Parental controls
Before handing over the iPad to your kid, you’ll want to take a look at the parental controls. There are, after all, a lot of stuff on both the App Store and online that you probably don’t want your child to be able to stumble onto. You’ll find all the settings you need in the Settings app, under Screen Time, and it’s, quite frankly, a lot.
First, you have the Downtime settings. These are for limiting your child’s use, if that’s something you want to do, in terms of time. I’ve blocked iPad usage between eight in the evening, to seven in the morning, for example.
Second, there are the App Limits settings. This is basically the same thing, but on an app level. You can limit a certain type of apps, like Social for example, or specific apps. Maybe you don’t want your kid to watch more than an hour of Netflix every day, then you set that limit to 60 minutes.
Communication Limits is another setting worth a thought. There are some limits to if and how your child can use things like Messages here. You’ve got a similar setting under Always Allowed, which also lets you define apps that will work, regardless of what state Screen Time is in. This could be for apps you use to communicate with your child, for example.

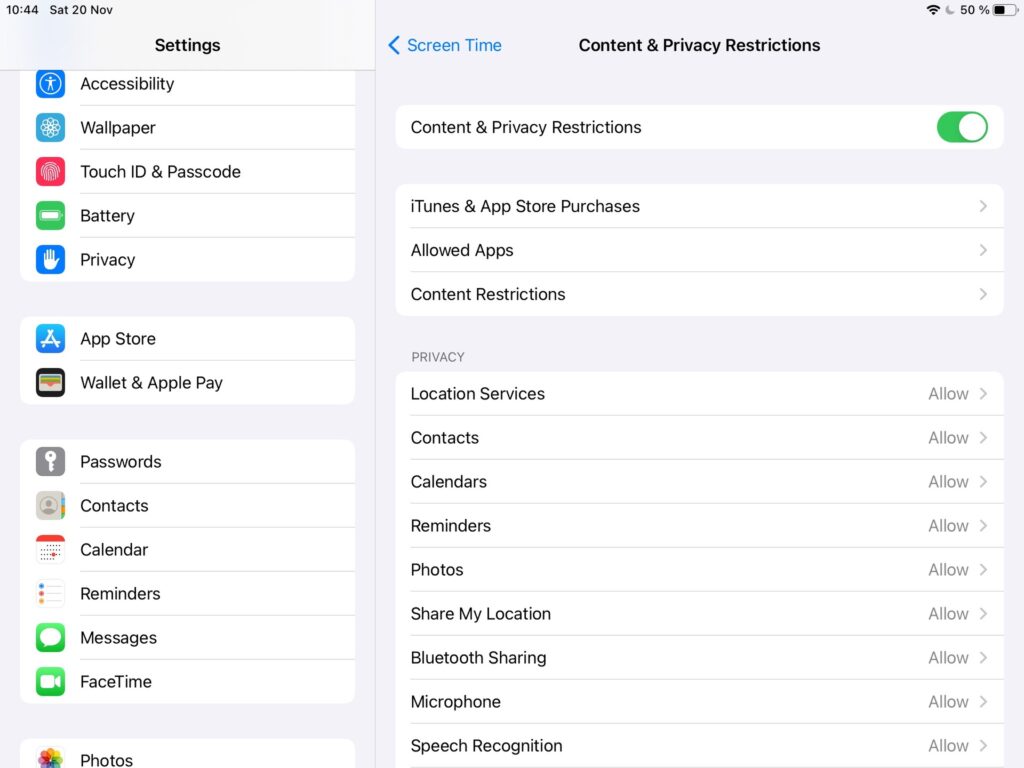
The final setting is Content & Privacy Restrictions. You should take the time to go through every option here, and limit things accordingly. For example, iTunes & App Store Purchases lets you turn off both installing and deleting apps, and in-app purchases, something you might want to do. Under Alllowed Apps, you can turn off default apps such as Safari, essentially blocking the internet and all its horrors. You might want to disable things like Airdrop too because who knows what weird stuff might show up that way.
Content Restrictions is a big one, with default settings for age ratings. This is where you can limit content, adding another level of safety. For example, you might not want your child to be able to see or even attempt to download apps made for nine years and older, then this is where you set that setting. The same goes for TV and movies. You can also limit what kind of websites are accessible, and turn off various Game Center settings.
It’s a lot, the whole Content & Privacy Restrictions settings, but this is where you take control of what your kid can do with the iPad. Spend some time going through it all, it’s worth it.
🔒 Screen Time passcode | When setting up Screen Time, you’ll be prompted to create a special passcode for Screen Time. This is a code for you, not your child, for when you need to bypass Screen Time. Don’t share it with your kid, and don’t make it the same as the device passcode, since that’s something your child should know and use.
There are more things to think about when getting your child an iPad. Things like, what apps should they get, and how are you going to protect the iPad from damage? I’ll cover some of this on the Switch to iPad site in the coming weeks, so stay tuned for that.
Now, that’ll have to be it for today because the tiny one really wants his iPad back. That’s quite understandable.
Until next time!
